With so much of new updates coming up along our way, we keep our phone updated along with so many apps. Android smart phone is one of the user friendly device which gives accessibility to tons f apps in the app market. So with this advantage we take in charge and install as many as apps that we think we need. In this process we come across so many problems of browsing one by searching for it in among all the apps. So now we are going to see a small easy trick to launch our favorite apps from the android lock screen.
In case you’re using an android marshmallow, then you will have to grant permissions to continue the process.

Then, in the general settings page, you will see the ‘notification bar’ option, enable it to proceed.

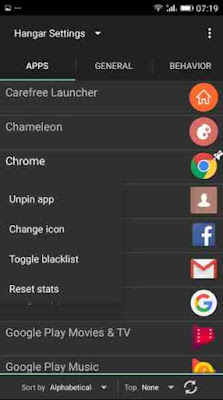
Next, to select the app to locate in the lock screen, tap on the ‘apps’ tab and chose the apps.
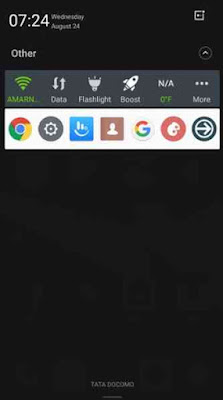
Now, all your selected apps will be pinned in your lock screen and also in your notification bar.
That’s it. You have successfully configured the app to launch your favorite apps from lock screen. So you can download this app directly from google playstore to your android smartphone by Clicking here.
As with time, every day we see new apps coming into the trend. With all of them, we install the app that attracts us and the apps that we need the most. Every one of us uses social media and so we would have downloaded as many social media apps too in our phones, along with games apps and many more. So all of these apps will be flooded in our phone home screen.
Sometime in instance, we take a few minutes to find the app we want. We will not be able to click open the app we want soon as with all the apps we will get confused of where it is located. It can eat up our time and make us get irritated in a few seconds. To overcome this problem we have a lot of solution. And that very solution is also brought out through an app.
Using this app I am going to introduce you to, you can easily manage the most wanted apps and locate them in your lock screen, whereby you will be able to launch it from there itself. You will not be pushed to search for every page in the home for your favorite app. This method will also solve the problem of unlocking the screen and going in to open the app. For those who does multi tasking can now easily launch another app that you have located in the lock screen with ease. So let’s see how to get the app that will help create a shortcut to the apps by launching them from the lock screen.
Using this app I am going to introduce you to, you can easily manage the most wanted apps and locate them in your lock screen, whereby you will be able to launch it from there itself. You will not be pushed to search for every page in the home for your favorite app. This method will also solve the problem of unlocking the screen and going in to open the app. For those who does multi tasking can now easily launch another app that you have located in the lock screen with ease. So let’s see how to get the app that will help create a shortcut to the apps by launching them from the lock screen.
Launch Apps From Android Lock Screen
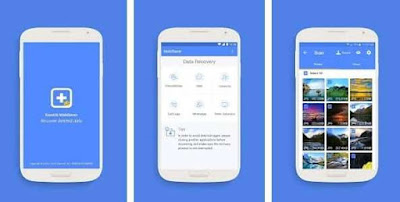
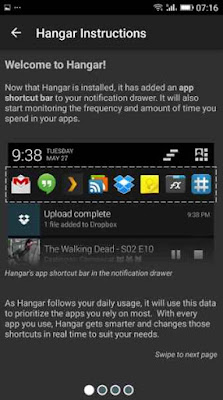
You have to get the app named 'Hanger' directly from google playstore to your android smartphone or tablet.
You have to get the app named 'Hanger' directly from google playstore to your android smartphone or tablet.
Let's move on to know how to launch your favorite android apps directly from lock screen.
Firstly, launch the app and it will open up to a screen page like showed below.
In case you’re using an android marshmallow, then you will have to grant permissions to continue the process.
Then, in the general settings page, you will see the ‘notification bar’ option, enable it to proceed.
Next, to select the app to locate in the lock screen, tap on the ‘apps’ tab and chose the apps.
Now, all your selected apps will be pinned in your lock screen and also in your notification bar.
That’s it. You have successfully configured the app to launch your favorite apps from lock screen. So you can download this app directly from google playstore to your android smartphone by Clicking here.
Now you can easily access your most used apps and launch them from the lock screen itself. No time will be wasted. This works perfectly in managing all the other apps and giving you an ease by pinning the shortcuts in both the notification bar and the lock screen.